If you haven’t yet had the opportunity to install the WDK from the Windows Developer Preview, we thought we’d provide you some guidance on installing the WDK and configuring a target machine for network debugging. Hopefully, when you decide to give it a spin, this guide will get you up and running a bit more quickly.
Install the Win8 Dev Preview on Target
The first step is to get Win8 installed on your target machine. For our testing, we’ve used a mix of real systems and virtual machines. For the writing of this article, VMWare Workstation 8 was used for both the host machine and the target machine.
To properly prepare your target machine, make sure that you create a local administrator account with a non-blank password. More importantly, once the installation is complete be sure to disableUAC! Failure to do so will lead to access denied errors on the host when trying to remotely configure the target.
Configure Host Machine
You can choose any host system that you like, though for this article we’re using a 32-bit install of Win8. Once you’ve chosen your host, you need to install VS2011 and the WDK, both of which are available through the MSDN Subscriber Downloads. Unlike on the target machine, it is very important that you do notdisable UAC on the host. Currently, network debug requires that the VS debugger application run without being elevated. If UAC is disabled on the host, there will be no easy way to guarantee this and will therefore result in strange errors when it comes time to debug.
We strongly urge you to install the 32-bit buildof VS2011. We were unsuccessful in our attempts to get the WDK properly integrated with the x64 build of VS2011, so don’t waste your time. As long as you’re using the 32-bit build of VS2011, installation of the WDK should be painless. Simply run \wdksetup.exe from the downloaded package and you’re on your way.
As part of your host system configuration, it is strongly recommended that you assign the host a static IP. This is solely because we’ll be using the network as our debug protocol and, in doing so, we’ll be providing the host machine’s IP as part of the debug settings. Failure to use a static IP may result in unexpected loss of the debug connection if the host’s IP changes at any point.
Configure Target through VS2011 on Host
For this article, we’ll forego using any project and just worry about getting VS to configure and connect to the target machine.
Even though we’ve explicitly told you in this article to leave UAC enabled on the host, in order to remotely configure the target machine you will need to run VS elevated on the host. This is a known restriction in the kit that may be addressed in the future and will not interfere with your ability to do network kernel debugging.
Once you’ve launched an elevated instance of VS, instruct it to attach to a process via the Debug->Attach to Process menu item, as seen in Figure 1.
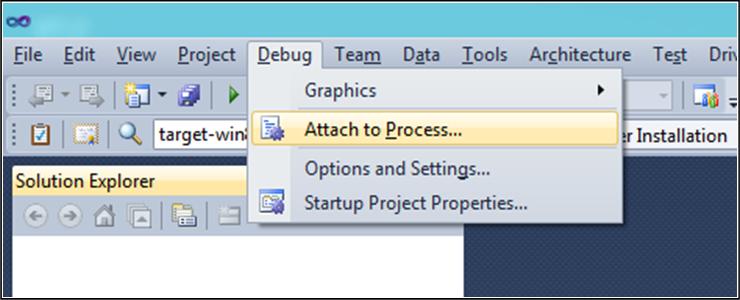
Figure 1
This will bring up the process attachment dialog which, if you’ve done everything correctly up to this point, should have a couple of new debuggers to choose from. We’ll be using the Windows Kernel Mode Debugger, as seen in Figure 2.
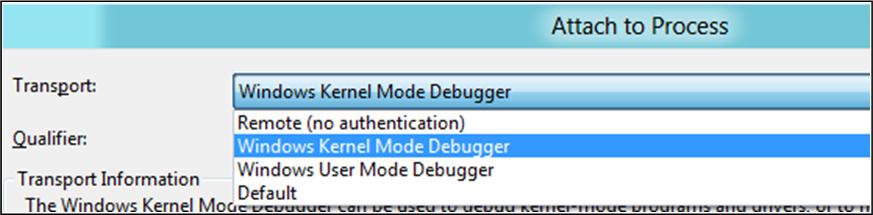
Figure 2
Next, we need to choose which machine we want to kernel debug. This is done via the Qualifier field of the Attach to Process dialog. This should be blank at this point, so we’ll click the Find button to locate a computer to configure (as highlighted in Figure 3).

Figure 3
Doing so will bring up the Configure Computers dialog, as shown in Figure 4. This dialog will be empty due to the fact that you have yet to configure any computers. Therefore, the next step is to add a computer, which can be done by clicking the Add button in the Configure Computers dialog.
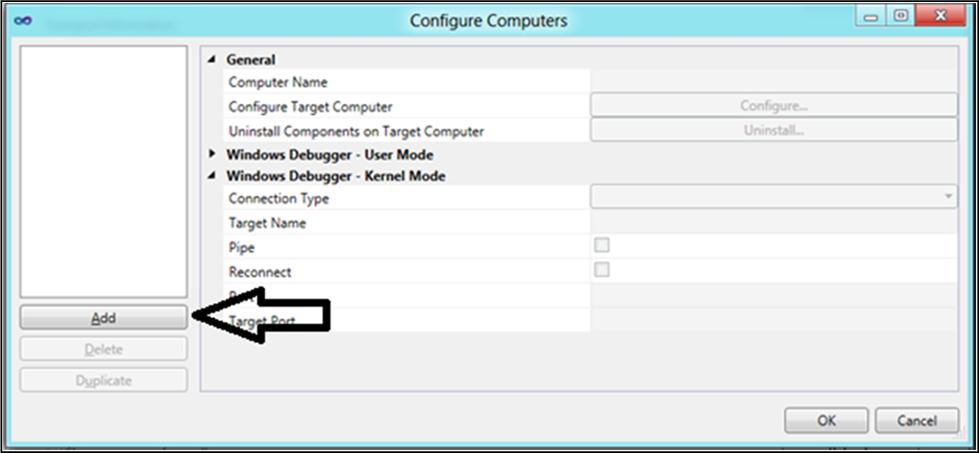
Figure 4
Computers are configured for debugging by their network name, thus you must be able to properly resolve your target computer by name. In our case, we’ve cleverly named the target machine win8-target. Therefore, that’s the name that we will provide for the Computer Name field in the dialog. The result of this can be seen in Figure 5.
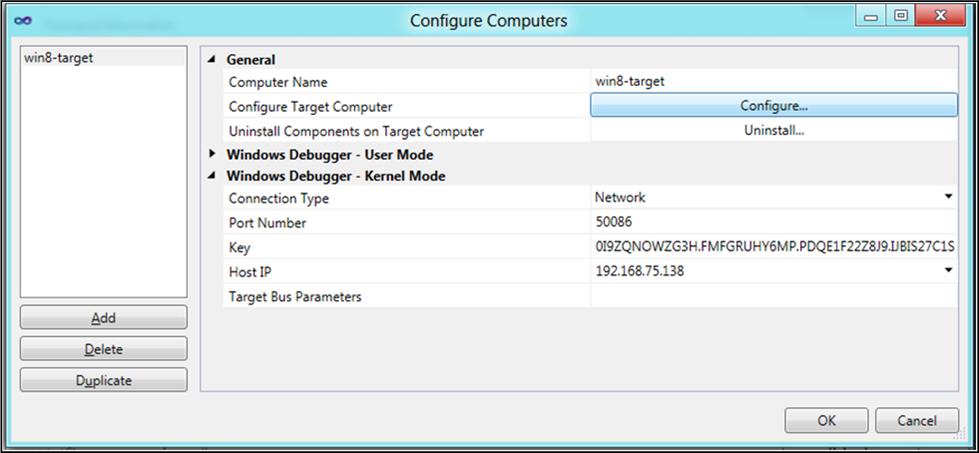
Figure 5
In Figure 5, you can see that VS has defaulted to using the network as the debug protocol. It’s also chosen a port number for us and even generated an encryption key to be used to encrypt the KD data transferred. For our purposes we can just leave the defaults the way that they are, but now is when you could change the debug transport to be 1394, USB, serial, etc. or change any specific debug settings.
At this point, we’re all set to click Configure and be presented with the dialog in Figure 6.
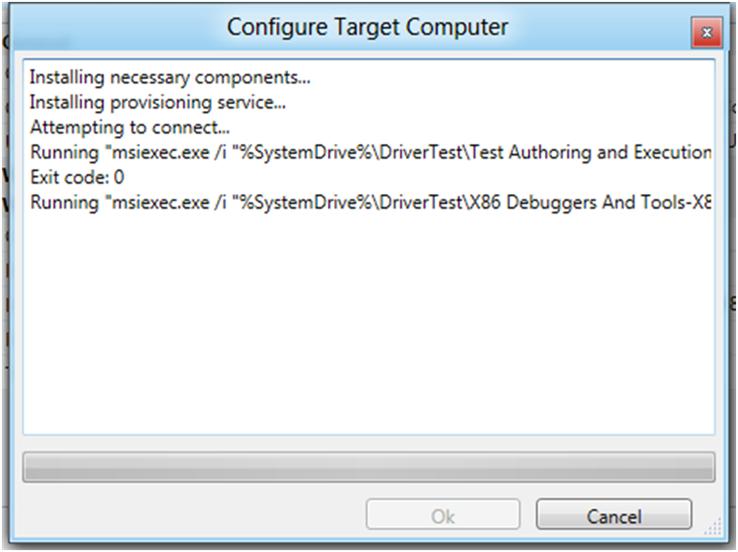
Figure 6
Expect this process to take several minutes, including a few reboots of the target machine. If you receive any access denied errors during this process, make sure that you have UAC disabledon the target and enabledon the host. Also be sure that you’ve run VS elevated on the host machine.
If everything works, you will eventually be told that the configuration succeeded and again be presented with the Attach to Process dialog. However, this time you’ll be given the option to attach to the target machine, as can be seen in Figure 7.
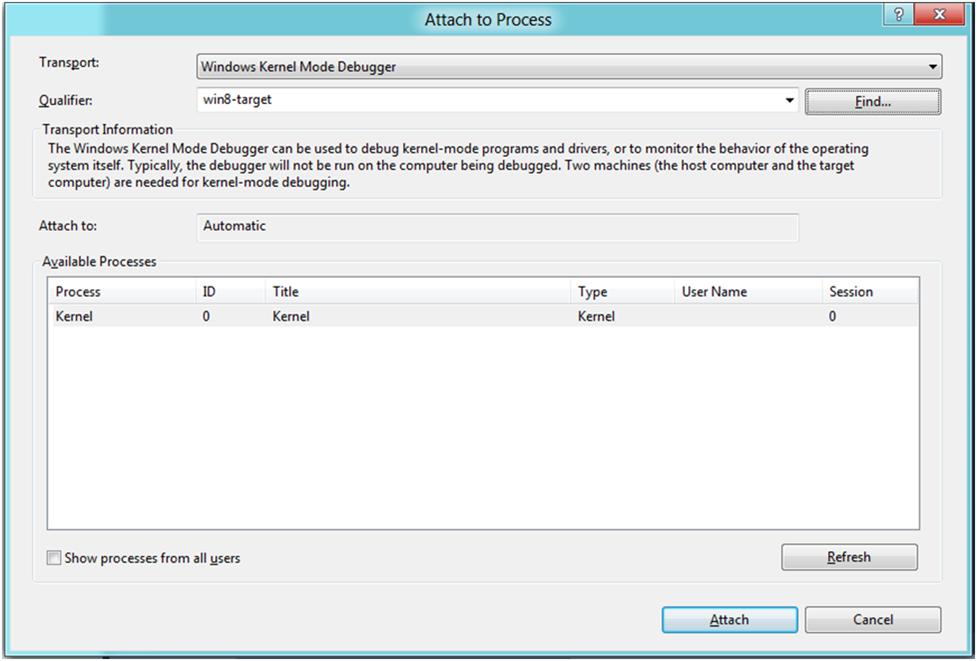
Figure 7
It’s worth mentioning that we had several cases where the configuration process appeared to hang during the kernel debug options stage. Checking the target machine, however, showed that kernel debugging was properly configured. We reported this to the WDK team and it’s being investigated. For now, it is safe to assume that if you make it to the, “Configuring kernel debugger” stage you can cancel out of the configuration but still successfully attach to the target.
The last thing to do is break into your target machine by clicking the Debug->Break All menu item (Figure 8). Then you’re all set to start enjoying your new development environment (Figure 9)!
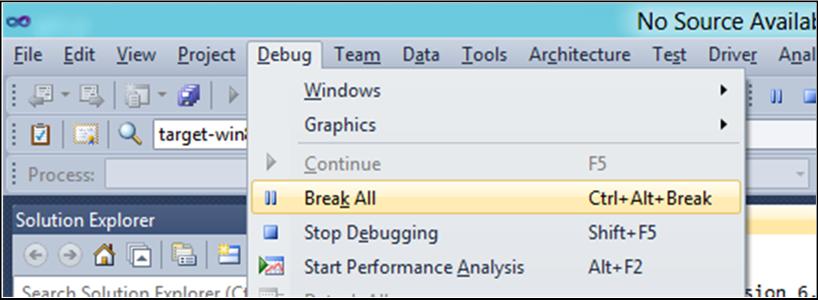
Figure 8
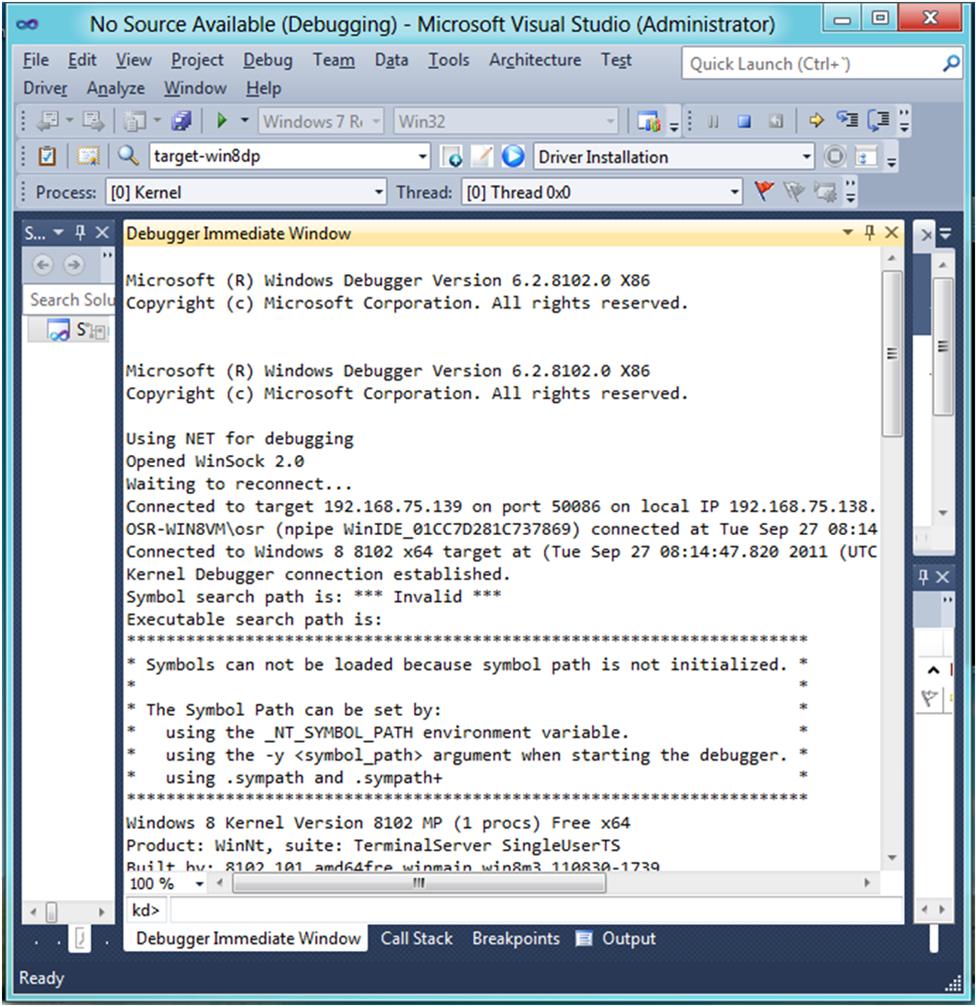
Figure 9


 Post Your Comment

